Google Presentations Tutorial - Getting Started
1. Go to Google.com and login to your account (use your Gmail address/password)
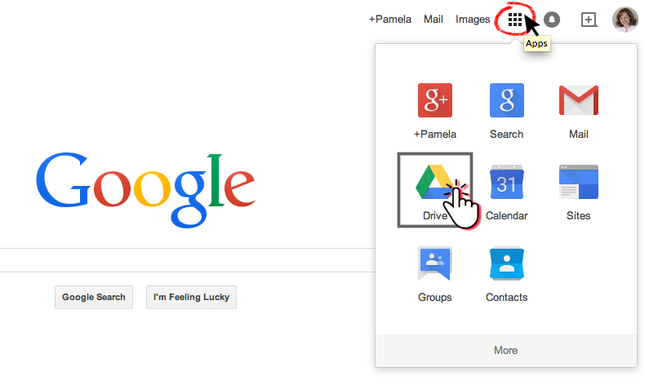
2. Click the "Apps" icon (3x3 grid) and select "Drive"
2. Click the "Apps" icon (3x3 grid) and select "Drive"
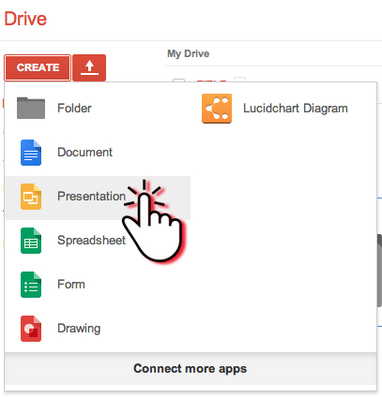
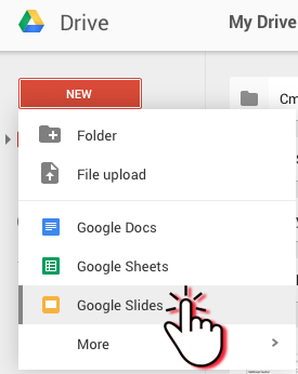
3. In the left column select the red button that says "Create" (Note: If your account has updated to the "NEW DRIVE" select "NEW"
and then select "Presentations" and then select "Google Slides"
In the "New Drive", Presentations is now called "Google Slides")
5. Choose a Theme and click the blue button at the bottom that says "OK"
6. Click the words "Untitled Presentation" ( #1 ) in the top left corner to name your document (type a name and click "OK").
6. Click the words "Untitled Presentation" ( #1 ) in the top left corner to name your document (type a name and click "OK").
7. Click on the text box areas and change the words to the titles that you want. (Click on the edges of a text box and then click the "delete" key on your keyboard to get rid of any text boxes you don't want.
8. Use the text tools in the menu bar to adjust the font, color, size, etc. (NOTE: You must double-click in a text box to see the font tools in the menu bar)
8. Use the text tools in the menu bar to adjust the font, color, size, etc. (NOTE: You must double-click in a text box to see the font tools in the menu bar)
9. TO ADD NEW SLIDES, click the "+" ( #2 ) button.
10. Click the "Background" or "Layout" ( #4 ) tab to adjust the look of your slide.
11. TO ADD PICTURES ("images") click on the image icon ( #3 ) -or- click "Insert" from the menu bar and choose "Image" from the drop down list.
- Drag a picture from your computer/desktop into the dashed box
- Click on the words "Google Drive" and select an image from your clipart folder.
- Re-size image by clicking and dragging the corners.


